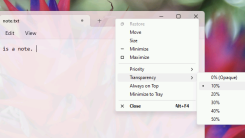
Use This App to Add More Window Management Options to Your PC
Ever wish a certain window could be pinned above all other ones? Or that you could see through a window to whatever's behind it? A free and open sourc

The screenshot function on your Mac allows you to capture or record and save or share whatever is on your screen, whether that's an image, a specific window, or a video tutorial. This guide walks you through all the ways to use and customize your Mac's built-in screenshot tool.
Your Mac has a handful of keyboard shortcuts for quickly capturing screenshots. To grab a full-screen screenshot, use Command + Shift + 3. To capture only a specific area, hit Command + Shift + 4, click and drag around your selection, and release to take the screenshot. Holding down the Spacebar while you click and drag will allow you to move the selection around your screen.
You can also capture a specific window or menu using Command + Shift + 4 + Spacebar, which turns your pointer into a camera icon, allowing you to click the window you want to capture. If you want to exclude the drop-shadow effect, press and hold Option while you click.
Alternatively, you can open the Mac screenshot toolbar to take screenshots and adjust various screenshot settings (which we'll get to below). Use the shortcut Command + Shift + 5, which will pop up a floating window. Here you can select from the three screenshot types (Capture Entire Screen, Capture Selected Portion, Capture Selected Window) and the two screen recording options (Record Entire Screen or Record Selected Portion) as well as open the Options menu to get more granular with how screenshots are taken and treated.

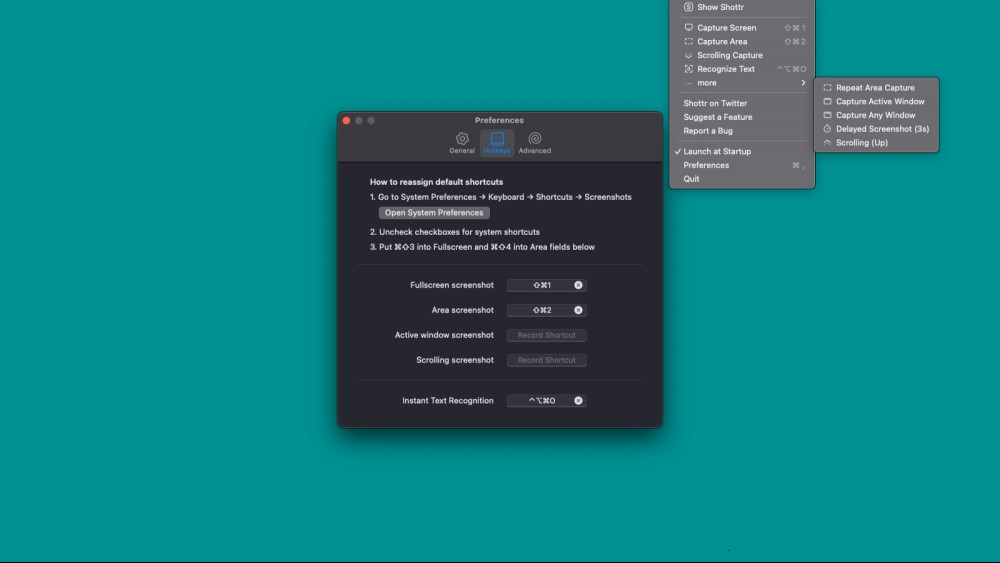
While Mac's built-in screenshot tool is pretty good, it doesn't have a scrolling screenshots feature, the ability to copy text from images, or robust editing tools. For that, you may consider replacing the screenshot tool with a third-party screenshot app, such as Shottr (free) or Cleanshot X ($29 for an initial license).
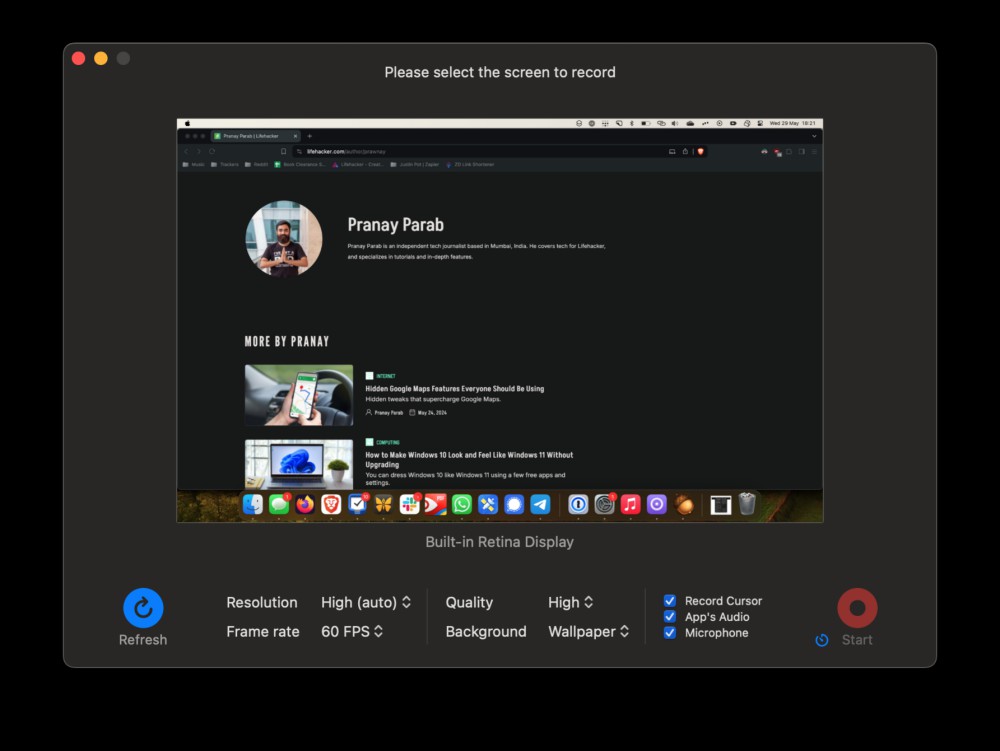
The Mac screenshot tool has a screen record function, which allows you to record your entire screen or just a portion. Use the Command + Shift + 5 shortcut to open the tool and select Record Entire Screen or Record Selected Portion from the middle section of the floating toolbar. When you're ready, hit the Record button. To stop the recording, reopen the screenshot tool (Command + Shift + 5) and hit Stop Recording or use the Command + Control + Esc shortcut. You can also select the audio input for your recording under Options > Microphone.
Alternatively, you can access the screen recording function through the QuickTime Player app by choosing File > New Screen Recording. While the built-in screen recorder does the basics, you could also download QuickRecorder, a recording app that has significantly more customization available.
If you need a few extra seconds to set up your screen after using a screenshot shortcut but before actually capturing it, you can set up a screenshot timer in the screen capture tool. Hit Command + Shift + 5 to open up the screen capture tool, then select the Options button on the floating menu. (If you don't see Options, be sure one of the screenshot methods is selected.)
Under Options, you can edit your Timer settings between "Off," "5 Seconds," and "10 Seconds." If you choose a five or 10 second delay, a countdown will appear in the floating menu. You can also choose whether you want to use a timer just for this capture or as a default by checking or unchecking Remember Last Selection in the Options menu.
Mac screenshots are saved to the desktop by default. This may be fine if you are taking the occasional screenshot and using (and deleting) it immediately, but screenshots can quickly clutter your desktop, and moving them manually can be a pain. If you take screenshots frequently, you can change where your Mac saves them to avoid the mess.
One alternative for screenshots you use right away is to save them to your clipboard and paste them directly into the app—such as Messages or your photo editor—where you need them. Use the keyboard shortcuts Command + Control + Shift + 3 (for the entire screen) or Command + Control + Shift + 4 (to select part of the screen) to save the screenshot to your clipboard. Then use Command + V to paste it.
If you have screenshots you want to hang on to, you can change where your Mac saves them. Use Command + Shift + 5 and click Options in the floating screenshot menu. Choose any folder or location from the Save to section, or click Other Location to select one that isn't listed.
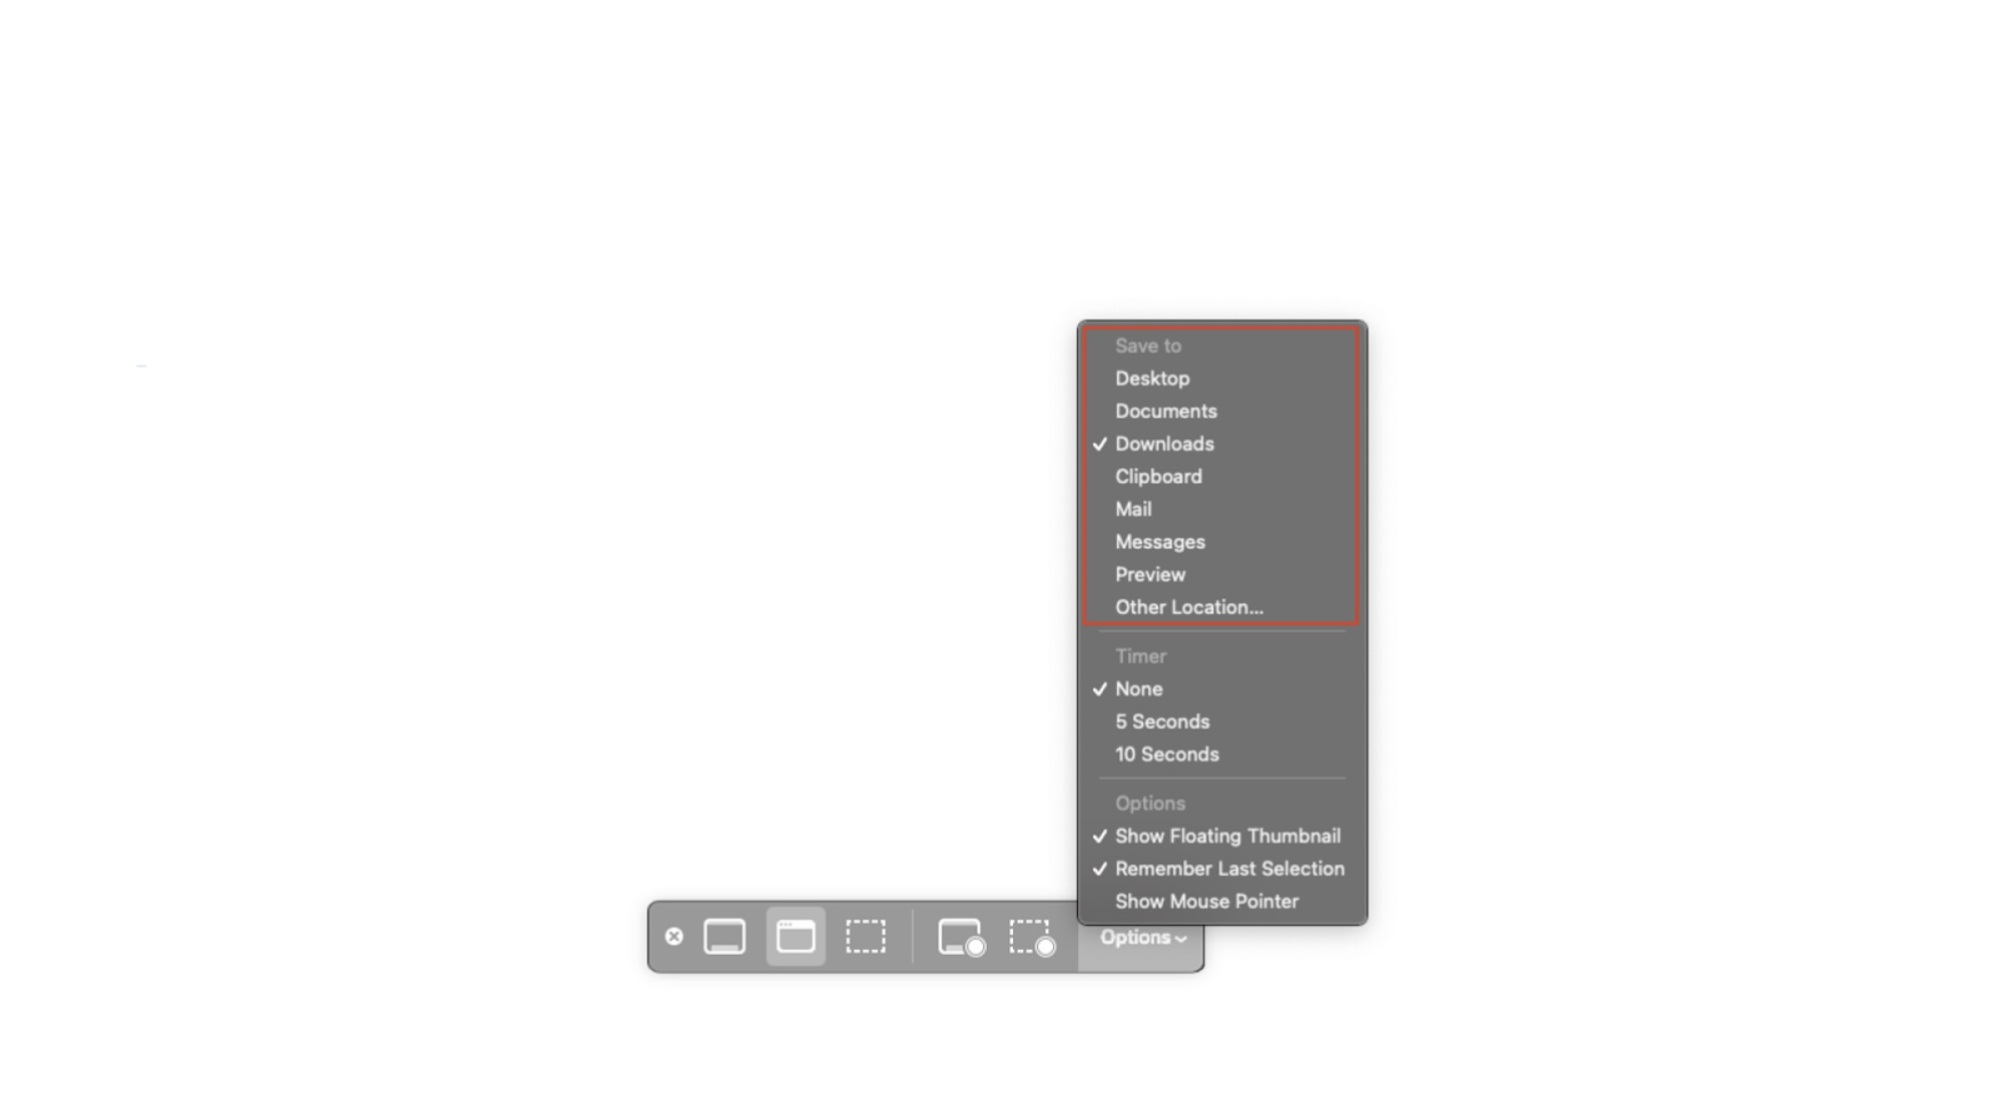
There may be some cases where you want your mouse cursor to be visible in a screenshot so you can point to a specific spot on the screen. Mac hides this by default, but thankfully the handy Options menu in the screen capture tool allows you to customize this setting. Use your Command + Shift + 5 keyboard shortcut, then click Options on the floating toolbar. At the very bottom of the menu, toggle on Show Mouse Pointer. If you want to hide the cursor in the future, simply return to this menu and uncheck the setting.
For more tips on screenshotting on other platforms, check out our other guides:
How to Take a Screenshot on an iPhone
All the Ways to Take Screenshots on Windows
All the Ways to Take Screenshots on Android
Ever wish a certain window could be pinned above all other ones? Or that you could see through a window to whatever's behind it? A free and open sourc

The most exciting internet trend of the past few years is the return of the blog. People are posting again. It's great.I'm using "blog" a bit more loo

You think you just fell out of the coconut tree? Buddy, do I have news for you.If you're like me, you found out about Joe Biden ending his presidentia

The next batch of robot lawn mowers do so much more than just mow. For the last six months, I have had fun testing robot lawn mowers, and even in that

It's been three years since Apple refreshed the iPad mini, though you might not realize that based on aesthetics alone. The sixth-generation mini, for

For app developers, there's a lot of benefit in having their software start up with macOS: It means the program is available at a moment's notice, can
We are a dynamic information platform dedicated to delivering timely, relevant, and reliable content across a broad spectrum of topics. From the latest in technology and business to lifestyle, health, and global affairs, we aim to keep our readers informed and inspired.
Our editorial team is committed to maintaining high standards of accuracy and clarity, ensuring that every article provides value and context in an ever-changing world. We believe in the importance of accessible knowledge and strive to make complex topics understandable for everyone.
Whether you're here to stay updated on current events, explore thought-provoking features, or simply learn something new, our goal is to offer a trustworthy source of information that meets the needs of a diverse and curious audience.